Sunday, June 26, 2016

Ham, Leek and Cheddar Quiche

Cookbook Countdown is a monthly cooking/baking event, which I'm co-hosting with Emily's Cooking (Makan2) Foray.  Everyone is welcome to join us. How does it work? To summarize, you may select a cookbook from your own cookbook collection, to cook or bake from each month. That selected book shall be your cookbook of the month. You may cook any recipes and as many recipes as you want from your selected book of the month. This is a fabulous way of using your cookbooks at least once! For more information on how to join Cookbook Countdown, please click here. 


************************


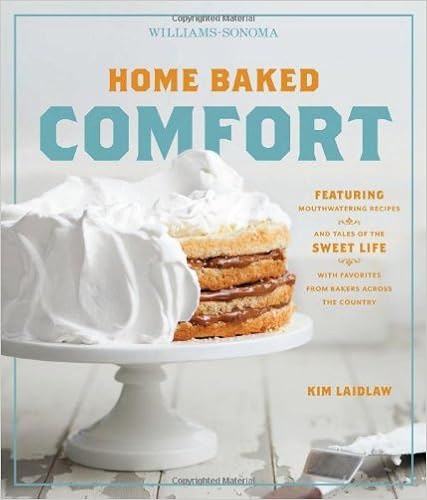
I made a savoury bake, Ham, Leek and Cheddar Quiche from my selected cookbook for this month, at Cookbook Countdown #6Williams-Sonoma : Home Baked Comfort by Kim Laidlaw.

According to the author, "Quiche is one of the most versatile dishes you can make. It can be varied with the seasons; accomodate a spectrum of cheeses, vegetables, and meats; and be served for breakfast, lunch, or dinner. This is one of my all-time favourite quiche combinations."

Quiche is a favourite in my house, and I have made many versions of quiches, with different meats and vegetables. When I saw the photo of this recipe in the book, I knew that I will have to give this a try sooner or later! I like how the long slices of leeks arranged over the top, sprinkled with cheese and bake to a golden delicious colour.


Long slices of leeks sauteed in butter, is arranged on top of the filling.


The crust is pretty easy to handle. I've used a rectangular tart pan with dimensions 8x12-inch. The flaky pie dough in the recipe is for a single 9" round crust. So I have made one and a half recipe for both the dough and the filling to fit my pan. Follow the usual steps for making the crust dough as instructed in the recipe, and the steps for blind-bake.

The filling is made by sauteing the sliced leeks until wilted and the diced ham is added in. An extra leek is sliced lengthwise and then saute in butter until wilted. In a large glass measuring jug, whisk the eggs, milk, sour cream, a pinch of salt and black pepper. Scatter the leek and ham mixture onto the prepared crust, pour in the milk mixture, then arrange the long leek slices, followed with the sprinkling of cheese over the top. I have used Cheddar cheese as Gruyere cheese is not easy to find over here. Bake for about 30 minutes until the top is golden.


Sprinkle some Cheddar cheese over the top. 


 Freshly baked and smells good!


Delicious quiche! Really nice when eaten warm, with a few slices of cucumbers and tomatoes. This would be great for lunch and even dinner with some other side salad. Just as the author says, it is the most versatile dish, for any meal of the day.


Ham, Leek, And Cheddar Quiche
(adapted from "Williams-Sonoma : Home Baked Comfort", Kim Laidlaw)
makes one 9-inch (25-cm) quiche
Flaky pie dough for single crust *
1 small leek, white and pale green parts
1 tbsp unsalted butter
Kosher salt and freshly ground pepper
1 thick slice Block Forest Ham, about 6 oz (185gm) diced
2 large eggs
1/2 cup (4 floz/125ml) whole milk
1/2 cup (4 floz/125ml) creme fraiche or sour cream
Heaping 1/2 cup (2oz/60gm) shredded Gruyere cheese

Prepare the pie dough and chill as directed. On a lightly floured work surface, roll out the dough into an 11-inch (28-cm) round about 1/8-inch (3mm) thick. Drape the dough over the rolling pin and ease it to a 9-inch (23-cm) tart pan with a removable bottom. Press the dough into the bottom and up the sides of the pan, then fold over the edge over on itself and press together. Put the pan in the freezer and chill for about 15 minutes. Position a rack in the middle of the oven and preheat to 400F (200C).

Prick the bottom of the pie shell with a fork, then line with foil. Fill with pie weights or dried beans. Bake until the crust is set but not browned, about 12 minutes. Remove the foil and weights. Prick any bubbles with a fork. Continue to bake until the crust is firm and very lightly golden, about 5 minutes. Set the pan on a wire rack. Position the rack in the upper third of the oven and reduce the temperature to 375F (190C).

While the crust is baking, quarter the leek lengthwise and slice; you should have about 1 cup (4oz/125gm). In a frying pan, melt the butter over medium heat. Add the leek and a pinch of salt, and cook, stirring occasionally, until the leeks starts to brown and becomes tender, about 3 minutes. Toss the diced ham into the pan, stir to combine with the leek, and remove from the heat.

In a bowl, whisk together the eggs, milk, creme fraiche, a pinch of salt, and a few grinds of pepper. Scatter the ham and leeks evenly over the crust, pour in the egg mixture, and sprinkle the cheese on top. Place the pan on a rimmed baking sheet and bake until the quiche is puffed and lightly golden and a knife inserted into the centre comes out clean, about 25-30 minutes. If you like, slide the quiche under the broiler for a few minutes to brown the top a bit more. Let the quiche stand on the wire rack for about 10 minutes. Serve warm or at room temperature.

Baker's Note :
To give this quiche a special flourish, buy an extra leek, preferably a small one. Thinly slice the white and pale green parts lengthwise, and saute them in butter until wilted. Lay the long leek slices on top of the quiche before you sprinkle it with cheese and bake.


Flaky Pie Dough : Single Crust (makes enough for one 9-inch (23cm) pie or tart
1-1/4 cups (6-1/2oz/200gm) all-purpose flour
1/4 tsp kosher salt
7 tbsp (3-1/2 oz/105gm) very cold unsalted butter, cut into cubes
5 tbsp (3 fl oz/80ml) ice water, plus more if needed

In the bowl of a food processor, stir together the flour and salt. Sprinkle the butter over the top and pulse for a few seconds, or just until the butter is slightly broken up into the flour but still in visible pieces. Evenly sprinkle the water over the flour mixture, then process just until the mixture starts to come together. Dump the dough into a large lock-top plastic bag, and press into a flat disk. Refrigerate the dough for 30 minutes or up to 1 day, or freeze for up to 1 month.


I'm linking this post with Cookbook Countdown hosted by 


Friday, June 24, 2016

Cleansing Cranberry, Orange and Peppermint Tea

It's "Fresh & Fruity" at I Heart Cooking Clubs (IHCC) this week. We are currently cooking with Curtis Stone, and he has tons of recipes using fruits, so selecting a fruity recipe is not much of a problem. I have a stack of Curtis Stone's recipes which I've printed from coles.com a few months ago, before their recipes became unavailable online. This is one of them, Cleansing Cranberry, Orange and Jasmine Tea.


The ingredients to make the cleansing tea ; oranges, dried cranberries and peppermint tea bag. Originally, recipe uses jasmine tea bag, but I did not have any. However, I do have a few other flavours and chose Peppermint Herb, which I thought would be nice with the orange juice.

I made half a recipe as I'm making it for myself. I used two oranges which are squeezed for the juice, which yield almost 3/4 cup, as they are quite big and very juicy. Put everything in a small pot, along with a cup of water, bring to a simmer, then remove from heat and let cool. Strain before serving.


This is quite delightful! Even though there is no sugar at all, it has a hint of sweetness from the dried cranberries and the sweet orange juice. Very nice. I rewarm the tea as I prefer drinking it warm. I was thinking of adding a cinnamon stick or maybe sub the orange juice with apple juice the next time. 


Cleansing Cranberry, Orange and Jasmine Tea
(adapted from coles, Curtis Stone)
1/2 cup dried cranberries
1-1/2 cups orange juice
2 jasmine tea bags
2 cups water

  1. Place a pot on medium heat and add the dried cranberries, orange juice, tea bags and water, and bring to a simmer.
  2. Take the tea off the heat, allow to cool and then strain and pour into a jug.
  3. When serving, add some orange rind.


I'm linking this post with I Heart Cooking Clubs (IHCC), theme for this week,
Fresh & Fruity


Monday, June 20, 2016

Chocolate-Bourbon Bundt Cake : Cookbook Countdown #6

Cookbook Countdown is a monthly cooking/baking event, which I'm co-hosting with Emily's Cooking (Makan2) Foray.  Everyone is welcome to join us. How does it work? To summarize, you may select a cookbook from your own cookbook collection, to cook or bake from each month. That selected book shall be your cookbook of the month. You may cook any recipes and as many recipes as you want from your selected book of the month. This is a fabulous way of using your cookbooks at least once! For more information on how to join Cookbook Countdown, please click here. 


************************

I made this boozy moist chocolaty cake, Chocolate-Bourbon Bundt Cake, for Father's Day. Another fabulous recipe from my selected cookbook for this month, at Cookbook Countdown #6Williams-Sonoma : Home Baked Comfort by Kim Laidlaw.


Made only half a recipe and used my half-sized bundt pan with a 6-cup capacity. I've reduced the sugar slightly, using scant 3/4 cup and for the bourbon, 1/4 cup plus 1 tablespoon. For half a recipe, I've baked the cake for 35 minutes.

As for the glaze, I find that when left to room temperature (as instructed in the recipe), it has thickened considerably and quite impossible to pour over the cake. I have therefore stirred in more cream, a little cream at a time, until I get the consistency I want.


This cake is delicious. It is moist, chocolaty bitter, though in a delicious way. And I can definitely taste the bourbon in it, very, very nice! Top with the chocolate glaze, this makes a wonderful cake for any celebration, though, with the amount of bourbon used, definitely not for young kids! Served with a scoop of homemade vanilla ice cream, this is a divine dessert treat! As with cakes like this, the taste gets even better the next day.  


Chocolate-Bourbon Bundt Cake
(adapted from "Williams-Sonoma : Home Baked Comfort", by Kim Laidlaw)
1 cup (8oz/250gm) unsalted butter
4 oz (125gm) bittersweet chocolate, finely chopped
1/2 cup (1-1/2oz/45gm) natural cocoa powder
2 cups (10oz/315gm) all-purpose flour
1 tsp baking soda
1/2 tsp kosher salt
3 large eggs
2 cups (1lb/500gm) granulated sugar
1 cup (8oz/250gm) sour cream
3/4 cup (6floz/180ml) bourbon
2 tsp pure vanilla extract

For the dark chocolate glaze :
1/4 cup (2fl oz/60ml) heavy cream
4 oz (125gm) bittersweet chocolate, chopped
2 tbsp light corn syrup
1 tsp pure vanilla extract

Vanilla ice cream or whipped cream for serving

Position a rack in the middle of the oven and preheat to 350F (180C). Butter and flour a 10-cup (2-1/2qt/2.5-l) Bundt pan.
In a small saucepan, melt the butter and chocolate over low heat, stirring with a whisk. Add the cocoa powder and stir until smooth. Let cool.
In a bowl, whisk together the flour, baking soda, and salt. In the bowl of a mixer fitted with the paddle attachment, beat together the eggs and sugar on medium speed until lightened. Stir in the sour cream, bourbon, vanilla, and cooled chocolate mixture on low speed. Stir in the dry ingredients just until combined. Scrape the batter into the prepared pan.
Bake until a toothpick inserted into the center of the cake comes out clean, about 40-45 minutes. Let cool in the pan on a wire rack for about 15 minutes, then unmould the cake onto the rack and let cool completely.
Meanwhile, make the glaze. In a small saucepan, warm the cream over low heat. Add the chocolate and corn syrup and stir with a whisk until the chocolate is melted and the glaze is smooth. Let cool to room temperature, then stir in the vanilla. Place the wire rack over a sheet of parchment paper or foil and pour the glaze over the top of the cake, letting it run down the sides. Slide the cake onto a serving platter. Serve thick slices with ice cream or whipped cream.


I'm linking this post with Cookbook Countdown hosted by 


Friday, June 17, 2016

Chicken Lady Chicken

This week at Cook the Book Fridays (CtBF), the recipe that was selected from the book which we are currently cooking from, My Paris Kitchen by David Lebovitz, is this delicious dish called Chicken Lady Chicken. I like the name of this dish! I was giggling to myself when I was thinking, what if it was called "Chicken Man Chicken" or even "Chicken Guy Chicken". Nope, both do not sound right, Chicken Lady Chicken sounds perfect to me!

This recipe calls for a chicken which is to be prepared in a spatchcocked (butterflied) style, where the backbone of the chicken is removed, then the chicken is pushed down, crack the bone between the breast so that it lies as flat as possible. I have however used 4 whole chicken legs. (yup, i can be pretty lazy at times!). One other thing that I did not follow was to marinate the chicken for about  3 to 4 hours instead of 1 or 2 days in advance as indicated in the recipe. The only thing that I did really follow was the ingredients for the marinade ; garlic, salt, olive oil, lemon juice, white wine, soy sauce, harissa, Dijon mustard, and honey. Mix everything together, spoon some of the marinade under the skin, and rub the balance all over the chicken, in a bag. Keep refrigerated, flipping the bag over a few times. 


After marinating for a few hours (or overnight), the chicken is browned on the stove top in a skillet or a large pan, with a foil covering the top, and a heavy object (I used a stock pot filled with water), placed over the foil. Cook until the skin is golden brown, flip chicken over and brown the other side, Remove the foil and weight off the chicken and finish baking in the oven. There was some marinade left in the bag, instead of discarding it, I poured the marinade over the pieces of chicken before baking.


The chicken is so delicious! Even though I've only marinated the chicken pieces for a few hours, the flavours really did come through in the meat, which is moist, tender, and very tasty from the lovely marinade. There's some delicious juices from the baking, which is yummy spoon over the chicken pieces. The family love this new dish. One that I would make again.  I served this chicken dish with the Fattoush salad which we made for our previous assignment at CtBF. Perfect match!


Wednesday, June 15, 2016

Coconut and Lime Shortbread : Cookbook Countdown #6

Cookbook Countdown is a monthly cooking/baking event, which I'm co-hosting with Emily's Cooking (Makan2) Foray.  Everyone is welcome to join us. How does it work? To summarize, you may select a cookbook from your own cookbook collection, to cook or bake from each month. That selected book shall be your cookbook of the month. You may cook any recipes and as many recipes as you want from your selected book of the month. This is a fabulous way of using your cookbooks at least once! For more information on how to join Cookbook Countdown, please click here. 


************************

The next bake that I've tried from my selected cookbook for this month for Cookbook Countdown #6Williams-Sonoma : Home Baked Comfort by Kim Laidlaw, is Coconut and Lime Shortbread.


Firstly, I've got to say that this is one of the best shortbreads, ever! According to the author, "A good shortbread cookie should be buttery and tender, crumbly and toothsome". And these are exactly that! 

The dough is easy to put together, only thing is do not overknead. It is then refrigerated for about 30 minutes. Once the dough is taken out from the refrigerator, work quickly as it softens rather fast. If it is too soft to handle, refrigerate the dough again before proceeding. Sliced to size, prick with a fork and scatter some sugar over the top. Bake until golden at the edges about, 22 minutes.  

There's lightly toasted shredded coconut and zest of a lime in the dough. And while the shortbread are baking, they smell delicious!


Buttery, tender, crispy, crumbly and so, so good! I've enjoyed snacking these Coconut and Lime Shortbread with a mug of hot black coffee. Another keeper recipe from this fabulous book! 


Coconut and Lime Shortbread
(adapted from "Williams-Sonoma : Home Baked Comfort", by Kim Laidlaw)
Makes about 2 dozen cookies
3/4 cup (6oz/185gm) unsalted butter, at room temperature
1/3 cup (3oz/90gm) sugar, plus more for sprinkling
finely grated zest of 1 large lime
1/2 tsp kosher salt
1/3 cup (1-1/2oz/45gm) packed sweetened shredded coconut, lightly toasted
1-1/3 cups (7oz/220gm) all-purpose flour

In the bowl of a mixer fitted with the paddle attachment, beat the butter and 1/3 cup sugar on medium-high speed until combined. Add the lime zest and salt, then stir in the coconut and flour, Beat on low speed until the dough comes together. Dump the dough onto a large pieces of parchment paper, top with another large piece of parchment, and roll out the dough about 1/4 inch (6mm) thick. Put the parchment-covered dough on a baking sheet and refrigerate for about 30 minutes.

Position a rack in the middle of the oven and preheat the oven to 325F (165C). Slide the dough onto a work surface. Remove the top piece of parchment and use it to line the baking sheet.

Cut the dough into finger-sized rectangles about 1 inch (2.5cm) wide or use a cookie cutter to cut into shapes. Transfer to the baking sheet, spacing the dough pieces slightly apart. Pierce the surface of the dough all over with a fork and sprinkle with sugar. Bake until lightly golden at the edges, about 22 minutes. Let the cookies cool on the pan for 5 minutes, then transfer to a wire rack to cool completely.


I'm linking this post with Cookbook Countdown hosted by 


Monday, June 13, 2016

Mini Chocolate Chip-Almond Muffins : Cookbook Countdown #6

Cookbook Countdown is a monthly cooking/baking event, which I'm co-hosting with Emily's Cooking (Makan2) Foray.  Everyone is welcome to join us. How does it work? To summarize, you may select a cookbook from your own cookbook collection, to cook or bake from each month. That selected book shall be your cookbook of the month. You may cook any recipes and as many recipes as you want from your selected book of the month. This is a fabulous way of using your cookbooks at least once! For more information on how to join Cookbook Countdown, please click here. 


************************


The next bake that I've tried from my selected cookbook for this month for Cookbook Countdown #6, Williams-Sonoma : Home Baked Comfort by Kim Laidlaw, is Mini Chocolate Chip-Almond Muffins, and they are addictive!


These little muffins are so easy peasy to make. I made them on the spur of the moment when I felt like baking something. Recipe uses cold butter straight from the refrigerator, cut into chunks and beat with almond meal and sugar till creamy and the rest of the ingredients are added in accordingly. I have used ready bought almond meal for the batter instead of using sliced almonds which is to be processed in the food processor with the sugar until finely ground. If you can get hold of almond meal, makes it much easier. I've added the zest from one orange as per suggested in the recipe for variation, but did not sprinkle on the flaked almonds.

Recipes says that it will yield about 3 dozen, but I got about 84 mini muffins! It was a good thing I had 4 sets of 24-hole mini muffin pans!


These were baked for 11 minutes and they rise with little humps on top and looks very cute in little red cups.


It was suggested in the recipe to serve these muffins warm. While they were very good when freshly baked and warm, we find that they tasted even better the next day. Very addictive, we find it is hard to stop at just 2 or 3. These were moist, soft and so yummy! Perfect with a glass of cold milk, hot coffee, cocoa or tea, take your pick! This is a keeper!


Mini Chocolate Chip-Almond Muffins
(adapted from "Williams-Sonoma : Home Baked Comfort", by Kim Laidlaw)
makes about 3 dozen mini muffins
1-1/2 cups (7-1/2oz/235gm) all-purpose flour
2 tsp baking powder
1/2 tsp baking soda
1/4 tsp kosher salt
2/3 cup (3oz/90gm) sliced almonds
1/2 cup (4oz/125gm) sugar (I use 100gm)
1/2 cup (4oz/125gm) cold unsalted butter, cut into chunks
2 large eggs
1 tsp pure vanilla extract
1 cup (8fl oz/250ml) buttermilk
1 cup (5oz/150gm) mini chocolate chips

Position a rack in the middle of the oven and preheat to 400F (200C). Line two 24-cup mini-muffin pans with paper liners, or grease with butter.

In a bowl, sift together the flour, baking powder, baking soda and salt. In a food processor, grind 1/2 cup (2oz/60gm) of the almonds and the sugar to make a fine meal. Pour into the bowl of a stand mixer fitted with the paddle attachment and scatter the butter over the top. Beat on medium-high speed until fluffy, about 1 minute. Beat in the eggs, one at a time, then the vanilla, until well combined, scraping down the sides of the bowl with a rubber spatula. Add the buttermilk and beat on low speed. Add the dry ingredients and chocolate chips, and, using the rubber spatula, stir just until evenly moistened.

Spoon the batter into the prepared muffin cups. Roughly chop the remaining almonds and sprinkle over the top. Bake until the muffins are golden brown and a toothpick inserted into the center of a muffin comes out clean, about 11 minutes, rotating the pans about halfway through. Let the muffins cool in the pans on a wire rack for about 5 minutes, then unmold onto the rack. Serve warm.


I'm linking this post with Cookbook Countdown hosted by 


Saturday, June 11, 2016

Kimchi Pancake

I'm sharing one more of Donna Hay's recipe I've tried, for this week's theme "Monthly Featured Chef : Donna Hay" at I Heart Cooking Clubs (IHCC).  I've made Kimchi Pancake.

Kimchi is a favourite in my house. Ever since I made my first kimchi almost two years ago, I'm hooked! There's always kimchi in my refrigerator ever since then. I have made kimchi dozens of times over the last two years. Right now, I have a new batch of kimchi in my refrigerator, which I've just made almost a week ago, and looking forward to make a pot of kimchi stew, our favourite kimchi dish. For now, it's Kimchi Pancake time.


Kimchi Pancake, served with Kimchi.


The pancake batter,  with lots of chopped scallions and chopped kimchi. After mixing everything together, the batter turns a lovely shade of red from the kimchi.


These are delicious. I've made some of the pancakes a little thicker and some a little flatter, to see which one we like. And we prefer the flatter ones! These pancakes looks rather nice with the red hue from the kimchi. I made these pancake on the weekend for a brunch snack and they are really perfect with a cup of warm tea. Do you like kimchi?


Kimchi Pancake
(from donnahay.com)
Makes 12
1-1/4 cups (185gm) self raising (self-rising) flour
2 eggs
2/3 cup (160ml) buttermilk
1 tablespoon fish sauce
1-1/2 cups (420gm) kimchi, chopped
2 green onions (scallions), sliced
2 tablespoons vegetable oil
kimchi, extra, to serve

Place the flour, eggs, buttermilk and fish sauce in a large bowl and whisk to combine. Add the kimchi and onion and mix well to combine
Heat 1 tablespoon of the oil in a large non-stick frying pan over medium heat. In batches, cook 2 tablespoons of the mixture for 2 minutes each side, or until golden brown and cooked through, adding the remaining oil as necessary. Serve the pancakes with the extra kimchi. Makes 12.


I'm linking this post with I Heart Cooking Clubs (IHCC), theme for this week
Monthly Featured Chef : Donna Hay


Thursday, June 9, 2016

A Good, Honest Sandwich Bread : Cookbook Countdown #6

Cookbook Countdown is a monthly cooking/baking event, which I'm co-hosting with Emily's Cooking (Makan2) Foray.  Everyone is welcome to join us. How does it work? To summarize, you may select a cookbook from your own cookbook collection, to cook or bake from each month. That selected book shall be your cookbook of the month. You may cook any recipes and as many recipes as you want from your selected book of the month. This is a fabulous way of using your cookbooks at least once! For more information on how to join Cookbook Countdown, please click here. 


************************

I'm using one of my favourite baking books for Cookbook Countdown #6 this month, Home Baked Comfort by Kim Laidlaw. She has a few bread recipes in the book, and I wished that she had more! This is the third bread recipe I've tried and so far I like them all, especially the soft and fluffy Cranberry Bread which I've made before. 


I like how she called this bread, "A Good, Honest Sandwich Bread". While I was making this bread, with the book opened on this recipe page, my son took a peek to see what bread I was making, and he had a good laugh at the name of the bread, as he thought it was funny calling a bread "honest"! But just as the author said, this is really "A Good, Honest Sandwich Bread"! 

The recipe makes 2 loaves, but I've made only half a recipe for one loaf. I've replaced both the flours in the recipe with bread flour. This is an easy, straight forward bread to make, nothing fussy about it. The dough is easy to work with. 


This bread, as the author describes, "is both moist and lightly dense and is superb for anything from turkey or grilled cheese sandwiches to cinnamon toast and eggy French toast".  I agree, this is a very nice bread, with light dense crumbs, yet soft in texture. I ate a piece on its own as it is quite tasty! We had it for breakfast with some tuna spread, and a mug of hot coffee. 


A Good, Honest Sandwich Bread
(adapted from "Williams-Sonoma : Home Baked Comfort", by Kim Laidlaw)
Makes 2 loaves
7 tbsp (3-1/2 oz/105gm) unsalted butter
1 cup (8fl oz/250ml) while milk
2-1/2 tsp kosher salt (for half a recipe, I used scant 1 tsp)
2-3/4 cups (11oz/340gm) all-purpose flour, plus more as needed
2-1/2 cups (12-1/2 oz/390gm) white whole-wheat flour
1 package (2-1/4 tsp) instant yeast
1 tbsp sugar

In a small saucepan, melt 6 tablespoons (3oz/90gm) of the butter over low heat. Add the milk, 1 cup (8fl oz/250ml) water, and the salt, and stir until the mixture reaches 120F (49C). Remove from the heat.

In the bowl of a stand mixer fitted with the dough hook, combine the flours, yeast, and sugar and mix together on low speed. Add the melted butter mixture and mix together on low speed. Raise the speed to medium and knead until the dough is smooth, about 10 minutes, adding a little more all-purpose flour if needed for the dough to pull away from the sides of the bowl. The dough should be a little sticky.

Dump the dough onto a lightly floured work surface and knead for 1-2 minutes. Form the dough into a ball, place it in the mixing bowl, cover with plastic wrap, and let rise in a warm draft-free spot until doubled, about 1 hour.

Butter two 9-by-5-inch (23-by-13-cm) loaf pans. Dump the dough onto the lightly floured work surface. Divide into 2 equal pieces. Flatten each piece into an 8-1/2-inch (21.5-cm) square. Roll up each piece of dough, pinch the seam to seal, and place the dough seam side down in a loaf pan. Cover with plastic wrap and let rise until puffy, about 45 minutes.

Position a rack in the middle of the oven and preheat to 375F (190C). Melt the remaining 1 tablespoon butter and gently brush the tops of each loaf with it. Bake until the loaves are golden brown and sound hollow when tapped, about 30 minutes. Turn out onto racks and let cool completely before slicing.


I'm linking this post with Cookbook Countdown hosted by 


Tuesday, June 7, 2016

Peach and Vanilla Sorbet

This week at I Heart Cooking Clubs (IHCC), the theme is "Monthly Featured Chef : Donna Hay".

The weather has been unbearably hot, and the thought of a cold dessert is so tempting. Found the perfect cold dessert from Donna Hay's website that I'm sure my family would love, Peach and Vanilla Sorbet. What better treat than a generous serving of smooth, luscious, sweet delicious sorbet to enjoy on a hot afternoon or anytime of the day! 

Donna Hay's, Peach and Vanilla Sorbet uses canned peaches. I did not have any vanilla bean paste, so I have replaced with the seeds of one moist vanilla pod. The peaches, its syrup, vanilla seeds are pureed in a blender till smooth. Word of advice, for a smooth pureed texture, use the blender instead of the food processor. A blender would do a better job for a smoother puree. Add the lemon juice of which I've used about 3 tablespoons, and I have added about 2-3 tbsp of icing sugar as the mixture is really not sweet at all. Pour into a baking tray and freeze for several hours until set. I left mine overnight in the freezer. Cut the frozen sorbet into squares and process in a food processor until smooth. You will see the change from a frozen sorbet to a luscious smooth sorbet. Pour into a container and freeze until set. 


The sorbet is easy to scoop, as it is smooth, soft and so yummy! And so easy to make! No excuse not to make this again!


Peach and Vanilla Sorbet
(from donnahay.com)
Makes 1 litre
1 x 1kg can peach slices in syrup
2 teaspoons vanilla bean paste
1/4 cup (60ml) lemon juice

Method
Drain the peach slices, reserving 1-1/2 cups (375ml) of the syrup. Place the peaches, reserved syrup, vanilla and lemon juice in a food processor and process until smooth. Pour into a 20cm x 30cm metal tin and freeze for 3-4 hours or until set.

Cut sorbet into squares and in batches, place in a food processor and process until smooth. Return the sorbet to the freezer for 1 hour or until ready to serve. 


I'm linking this post with I Heart Cooking Clubs (IHCC), theme for this week
Monthly Featured Chef : Donna Hay


Monday, June 6, 2016

Chicken Fried Rice with Egg and Buk Choy

This week's theme at I Heart Cooking Clubs (IHCC) is Local & Seasonal!"Make any Curtis Stone recipe from his books or online that includes or features ingredients that are growing in your geographic area and/or are locally produced where you live." Well, I've used my homegrown pak choy to cook his simple fried rice for lunch. 


A quick and simple fried rice. I've used leftover cooked jasmine rice from the day before and have used frozen mix veggies (carrots, corn and peas) instead of canned corns. 


Pak Choy and fresh coriander leaves, both from my garden pot. Definitely one hundred per cent locally produced! :)


Chicken Fried Rice with Egg and Buk Choy
(adapted from coles, Curtis Stone)
1 cup long grain white rice, rinsed, drained
1/3 cup canola oil
2 large eggs, lightly beaten
1/2 medium brown onion, thinly sliced
1 large carrot, peeled and finely diced
1/2 x 400gm can corn kernels, drained (I've used frozen mixed veggies)
1/2 bunch buk choy
2 tbsp soy sauce
1 tsp sesame oil
1/4 bunch coriander leaves, to serve
4 chicken thigh fillets, skin removed, cut into bite sized pieces
salt & pepper

  1. Cook the rice in rice cooker or according to packet directions with approximately 1-1/2 cups water (375ml) until tender. Transfer to a baking paper lined tray, cover with plastic wrap and refrigerate until cold.
  2. Heat 1 tbsp oil in a large wok over medium-high heat. Add the eggs and stir with a wooden spoon for about 30 seconds, or until just cooked. Remove fromthe wok and set aside on a plate.
  3. Return the wok to the heat and add another tbsp of oil, season the chicken with salt and pepper and cook for 4-8 mins, or until golden and cooked through. Remove cooked chicken to a plate.
  4. Heat the remaining oil in the wok over medium-high heat. Add the onion and carrot to the hot wok and stir-fry for 2-3 mins to soften. Add the cold rice and stir-fry for 2 mins or until heated through. Season with salt and pepper. Stir in the eggs, chicken, corn and buk choy.
  5. Add the soy sauce and sesame oil and continue to stir-fry for 1 minute. Transfer the rice to a large serving platter ; sprinkle with the coriander.


I'm linking this post with I Heart Cooking Clubs (IHCC), theme for this week, 
Local & Seasonal!


Friday, June 3, 2016

Fattoush

This week at Cook the Book Fridays (CtBF), the selected recipe from David Lebovitz's cookbook, My Paris Kitchen, is Fattoush, a salad dish. I have made Fattoush before, a recipe from Nigella Lawson which I've posted here, and I really love it! So I was pretty excited to try DL's version! 


Fattoush is a Middle Eastern salad and it uses the lovely spice Sumac. Traditionally, toasted pita breads is used in the salad, but I do not have any, and have used two pieces of wholemeal tortilla which I've toasted till crispy. The salad dressing is a mixture of lemon juice, salt, garlic, mustard and olive oil. Just before serving, toss the veggies with the dressing ; lettuce leaves, cherry tomatoes, cucumber, parsley, mint leaves and radishes, with some sumac and black pepper. I have omitted the radishes as I did not have any. Toss in the broken pieces of toasted pita (tortilla).

This is a very nice salad. I can't help comparing DL's Fattoush with NL's. And I prefer Nigella's version. If this is just another salad, then this is quite good actually, but since this is Fattoush, and since I have made Nigella's Fattoush, I prefer Nigella's simpler version without the mustard and the salad leaves. I like mustard but I think that a Fattoush is better without it. With the mustard, it is just like any other salad, at least for me!

We had this salad with Chicken Lady Chicken, (which is our next assignment in two weeks' time, so will be sharing that later), and it was a delicious meal. 

Please do stop by CtBF to see the other lovely ladies take on this salad.


Wednesday, June 1, 2016

Cookbook Countdown #6 : Oatmeal Jammy Bars

Cookbook Countdown is a monthly cooking/baking event, which I'm co-hosting with Emily's Cooking (Makan2) Foray.  Everyone is welcome to join us. How does it work? To summarize, you may select a cookbook from your own cookbook collection, to cook or bake from each month. That selected book shall be your cookbook of the month. You may cook any recipes and as many recipes as you want from your selected book of the month. This is a fabulous way of using your cookbooks at least once! For more information on how to join Cookbook Countdown, please click here. 


************************


My selected cookbook for this month, 


Home Baked Comfort is one of my favourite baking books. The chapters are divided into Breakfast, Breads, Cookies & Bars, Cakes & Cupcakes, Pies & Tarts, Custards & Souffles. I have baked a number of recipes from it, and the ones that I've tried are very good. I especially like the Cranberry Bread and Buttery Flaky Rolls

I've made Oatmeal Jammy Bars, because I wanted to use up my opened jars of jam which are cluttering my refrigerator. I was looking for recipes to use up all that jam, and found this simple, easy bar snack that can be made in a jiffy, though the baking takes about 40 minutes. 


The base and topping is the same, an oat mixture using rolled oats, flour, butter, brown sugar, orange zest, ground cinnamon and vanilla extract. The oat mixture is a little crumbly and a little dry, but according to the author, it is supposed to be like that, and it will work out fine. Press about two thirds of the crumbly oat mixture to the bottom of the pan, and it does work out fine after all! The mixture sort of bind together even though they are very crumbly. 

For the filling on top, I have used opened jars of jam which I wanted to clear. I've used raspberry jam, apricot jam and my homemade orange jelly which I've made a while back and they have set rather thick, so it is perfect for bakes like this. Spread the jam over the oat mixture evenly, then scatter the top with the remaining oat mixture. I press the oat mixture lightly into the jam. Bake for 40 minutes until the top is golden brown and the jam are bubbling.


What a relief that these are gone, in a delicious way, of course!


Cut into bars or slices to serve.


Oatmeal Jammy Bars with  three different jam fillings, raspberry jam at the bottom slice, apricot jam in the centre slice and my homemade orange jelly right on top.
Makes quite a nice bar to snack on with a cup of warm tea. The oat mixture crust is very chewy from the oats, and it smells really "cinnamony-vanilla" nice.


Oatmeal Jammy Bars
(adapted from "Home Baked Comfort", Kim Laidlaw)
Makes about 18 bars
1-2/3 cups (8-1/2 oz/265gm) all-purpose flour
1 cup (7oz/220gm) firmly packed light brown sugar (I use 120gm)
1/2 tsp kosher salt (scant 1/2 tsp)
1/4 tsp baking soda
1 tsp ground cinnamon
2 tsp pure vanilla extract
finely grated zest of 1 small orange
3/4 cup (6oz/185gm) cold unsalted butter, cut into chunks
1-2/3 cups (5oz/155gm) old-fashioned rolled oats
1-1/2 cups (15oz/470gm) of  your favourite jam, such as apricot, raspberry or a mixture

Position a rack in the middle of the oven and preheat to 350F (180C). Generously butter a 9-by-13-inch (23-by-33cm) baking dish.
In a food processor, combine the flour, sugar, salt, baking soda, cinnamon, vanilla, orange zest, and butter. Pulse until the mixture looks like chunky crumbs. Add the oats and pulse a few times to mix. Press about two-thirds of the oat mixture into the bottom of the prepared pan. The dough will be super crumbly, and you might wonder if it will ever bake together, but press it down firmly so it all squishes together. I assure you that it will work. Spread the jam evenly over the top, then sprinkle the remaining oat mixture over the pan.
Bake until the top is golden brown and you can see the jam bubbling, 35 to 40 minutes. Let cool in the dish, then cut into bars.


I'm linking this post with Cookbook Countdown hosted by 

Secrets Of A Jewish Baker

by George Greenstein


2. Cheese Swirl Bread
1. Semolina Bread